
Security Package
The Security Package is a prebuilt set of model objects - a cube, its supporting dimensions, a card and the processes that drive them - that adds a front-end UI for configuring model security. It's designed to drop into most instances on a model-by-model basis.
Without it, security is configured object by object through the Gateway. With it, an administrator manages the whole picture from a single screen inside the application: which dimensions are secured, what each group can see within them, which screens each group reaches, and which users belong to which group.
Download
The file is named #Security.package. Save it as-is - the leading # is part of the filename and the import expects it.
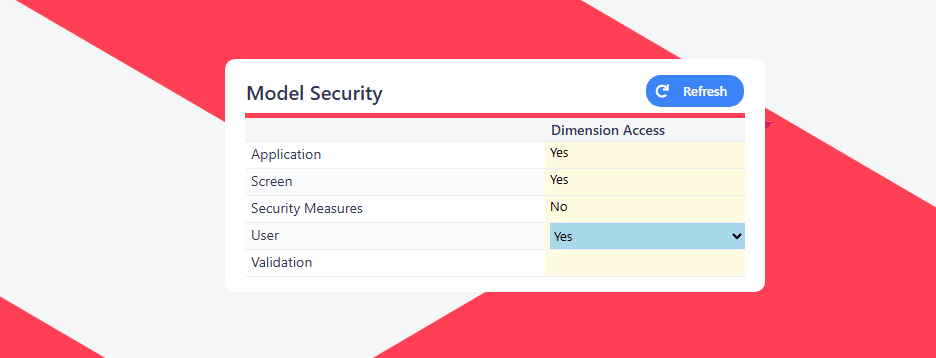
What the interface covers
The UI is divided into five areas:
| Area | Purpose |
|---|---|
| Model Security | Configure which dimensions are secured model-wide. |
| Group Security | Configure which elements of those dimensions each group can see, and which screens each group can reach. |
| User Security | Allocate users to groups. |
| Manage Users | Add and remove users. |
| Manage Groups | Add and remove groups. |
What the package contains
| Object type | Contents |
|---|---|
| Cube | Security |
| Dimensions | Application, Dimension, Element, Group, Screen, Security Measures, User, Validation |
| Card | Security - houses the UI |
| Processes | 24 processes that populate the dimensions, save the UI's inputs, and apply them to the model's real security settings |
See Security Package Processes for what each process does and how they chain together.
Installing the package
1. Upload and import
- Download the package, then upload it to the target instance's file store.
- Import it into the target model, selecting all package contents.
See Packages for the general import mechanics.
2. Create the screen
Create a Screen whose page is the Security card, in an appropriate Application within the model.
Create the screen before running setup
Setup reads the model's existing screens into the Screen dimension. Creating the security screen first means it's picked up in that pass - otherwise you'll need to re-run the dimension build before it appears in the UI.
3. Run the setup process
Execute the scripted process Model.Security.Setup.
This must run before anything else in the package is used. It reads the model's existing infrastructure - users, groups, dimensions, applications and screens - into the package's new dimensions, grants every group write access to the model, and gives Admin users an access tag for every application.
Until it has run, the UI has nothing to display and the other processes have nothing to act on.
Using the interface
Once setup is complete, administrators configure security from the screen created in step 2.
The important thing to understand is that editing a table does not change security settings. Saving happens in two distinct stages, and both are required before anything takes effect in the model.
Stage 1 - save the inputs to the cube
Enter the configuration you want into a table. The dashboard registers the edits and offers to save them:
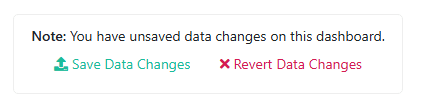
Save Data Changes writes what you typed into the corresponding cells of the Security cube. At this point the intent is recorded, but the model's actual security is unchanged.
Stage 2 - execute the saved values against the model
After the card refreshes, a Save Changes button appears beneath the table, along with a note that the table's values aren't yet applied:
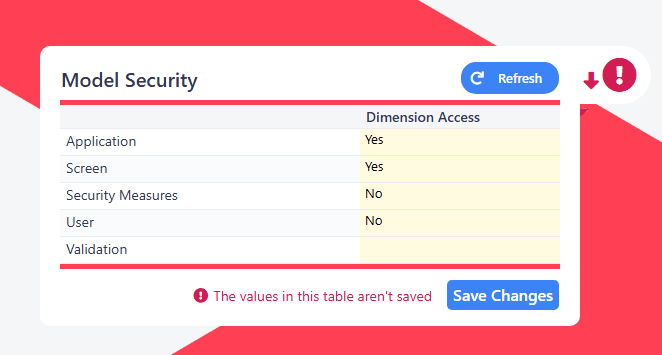
Save Changes takes the saved cell values and executes them against the model's real security settings. This is the point at which access actually changes.
Applying several tables at once
Stage 1 can be repeated across as many tables as you like before anything is executed. Saved cube values persist, so you can move between the different areas of the UI - and between screens - without losing them.
When you're ready to apply everything together, execute the process Model.Security.Refresh. It runs every populate, save and execute process in the correct order, so all outstanding changes across all tables are applied to the model in one pass.
Which route to use
Use Save Changes on a table for a single, targeted change. Use Model.Security.Refresh when you've staged edits across several areas, or whenever you want to be certain the model's security matches what the UI is showing.
Managing users and groups
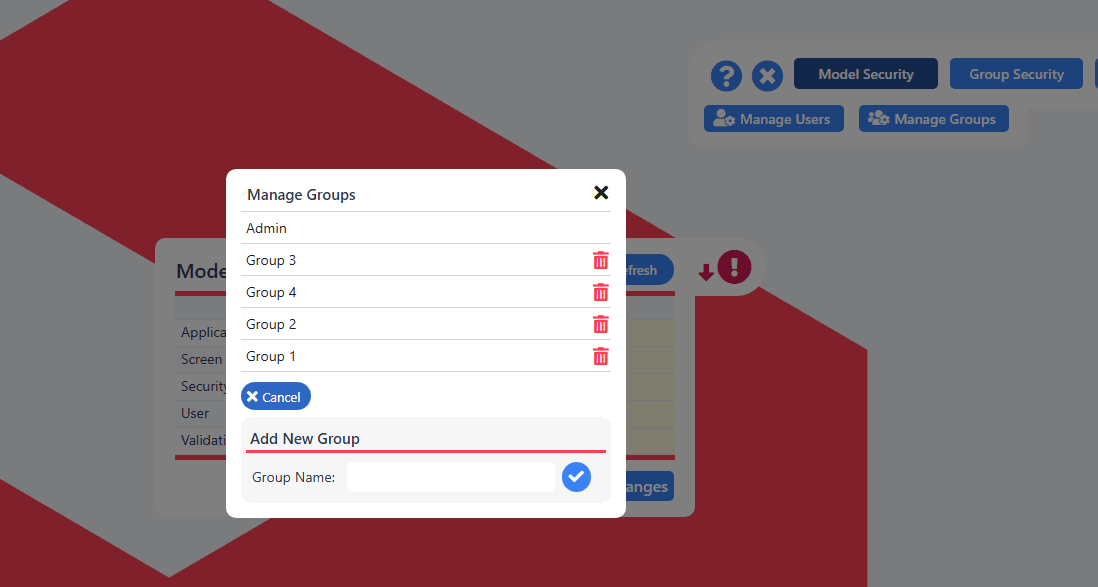
Users and groups are managed from modals rather than tables. Both are reached from the cog button in the UI.
| Task | Steps |
|---|---|
| Add a group | Cog → Manage Groups → Add New Group → enter the name → confirm with the tick. |
| Delete a group | Cog → Manage Groups → trash icon on the group's row. |
| Add a user | Cog → Manage Users → Add New User → enter name and email → confirm with the tick. |
| Delete a user | Cog → Manage Users → trash icon on the user's row. |
Deleting a group unallocates its users
Users allocated to a deleted group lose that allocation, and with it all access to the model, until they're reallocated to another group.
Refreshing the displayed data
Each table in the card has its own Refresh button. These run the processes that repopulate the table from the model's current state, so the values shown reflect the properties that actually determine access.
Use them when the model has changed outside the UI - a new screen, user or dimension added elsewhere - and the tables need to catch up.
Related
- Security Package Processes - what each of the 24 processes does
- Instance Security - the underlying element-level security model
- Access Tags and Application Security - the screen access layer the package writes to
- Packages - importing and exporting model objects