Using Instructions
Within our workview we can use the set instructions to change the elements that each dimension is displaying.
In our current workview, can expand groupings within a dimension by clicking on it.
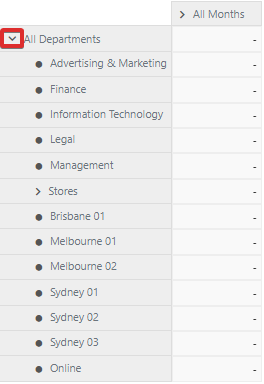
But if we want the default view to show all elements or a specific set, we can double click on the current selections and change the instructions. Double click on All Departments to open the Department set editor.
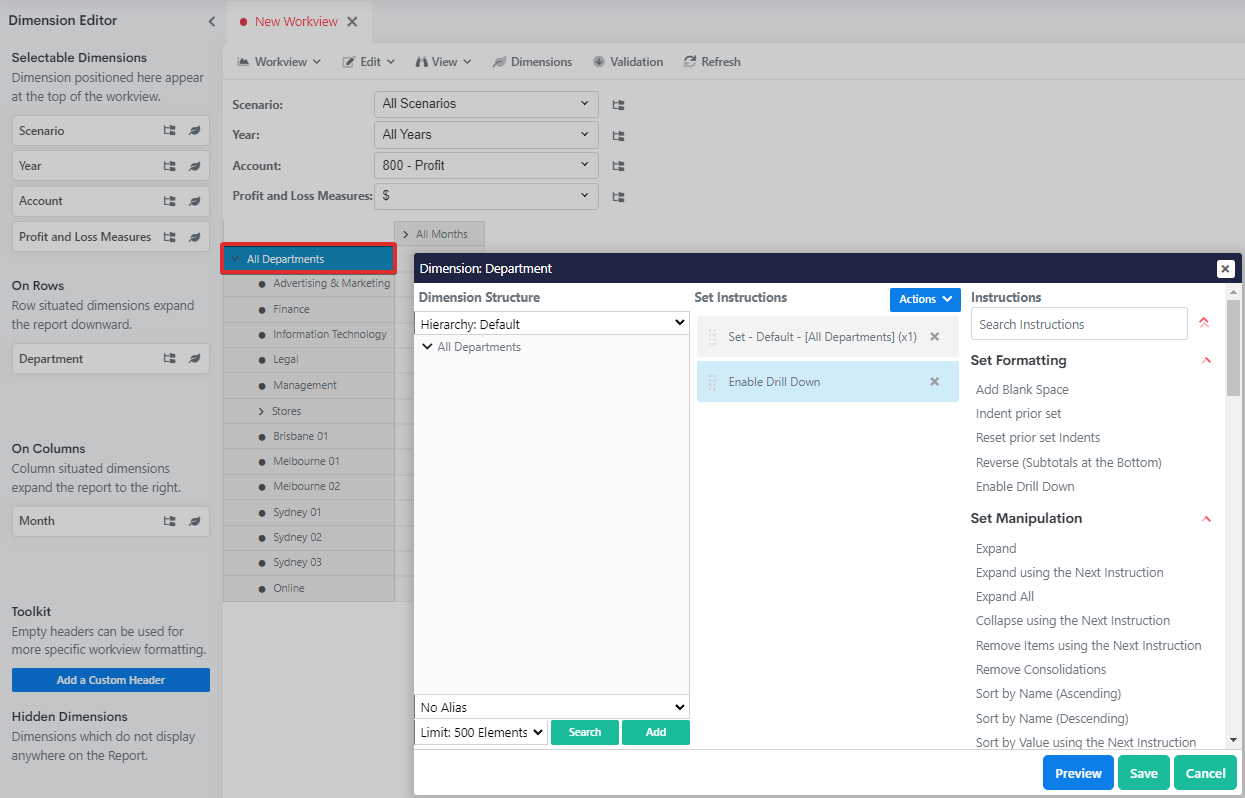
This is the Set Editor lets us provide a list of instructions which determine what data will show within the report. We can double-click on the items under the Instruction Dictionary column to include them in the Set Instructions.
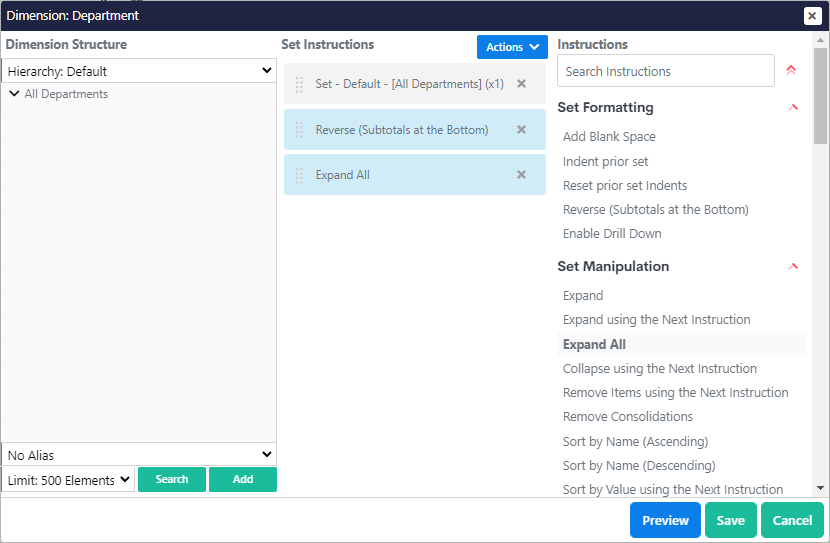
For now, we will simply expand all Departments. We will use the Reverse instruction before the Expand All instruction so that the totals are shown at the bottom. Double click on the instructions on the right panel to add them to set instructions and click Save.
To rearrange the instructions, we can simply drag and drop them.
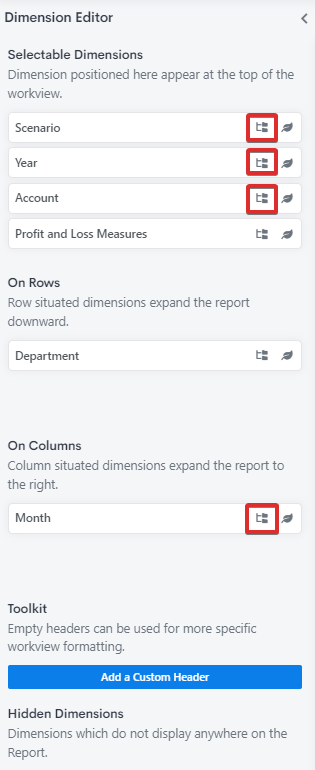
We will now edit the dimensions Scenario, Year, Account, and Month set instructions.
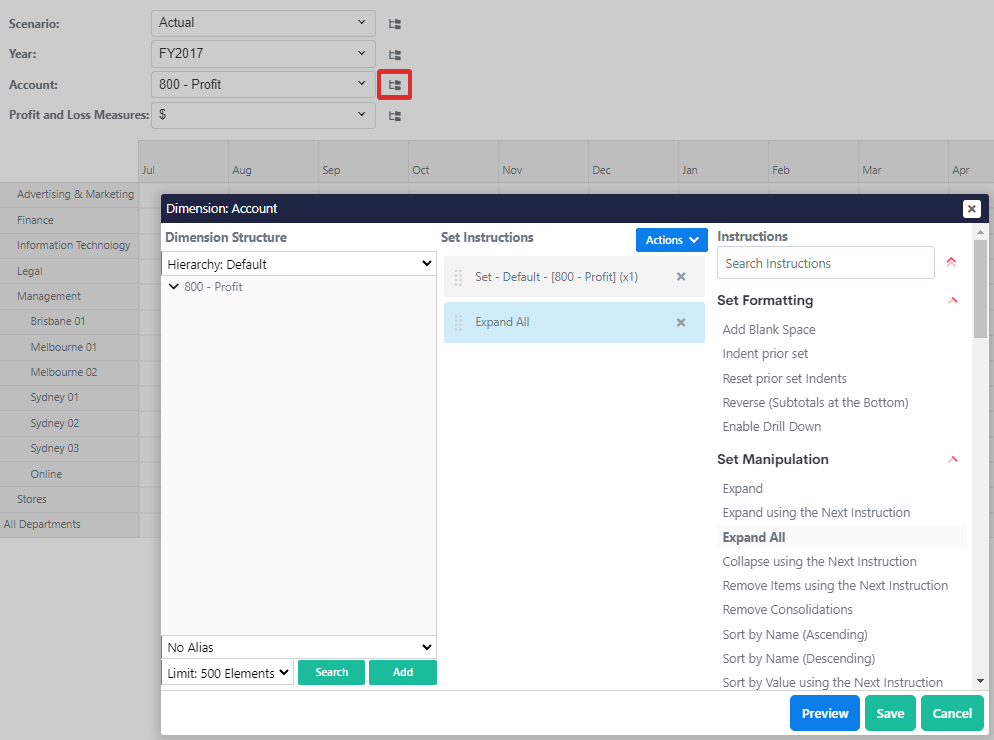
For the Account dimension, we will go into the set editor and remove Enable Drill Down and add the instruction Expand All then click save.
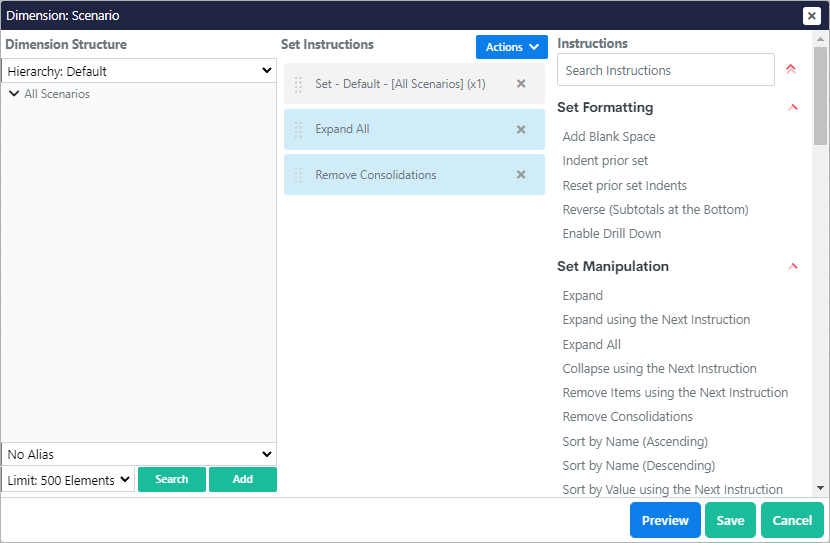
We will do the same for Scenario and Year except we will also add Remove Consolidation.
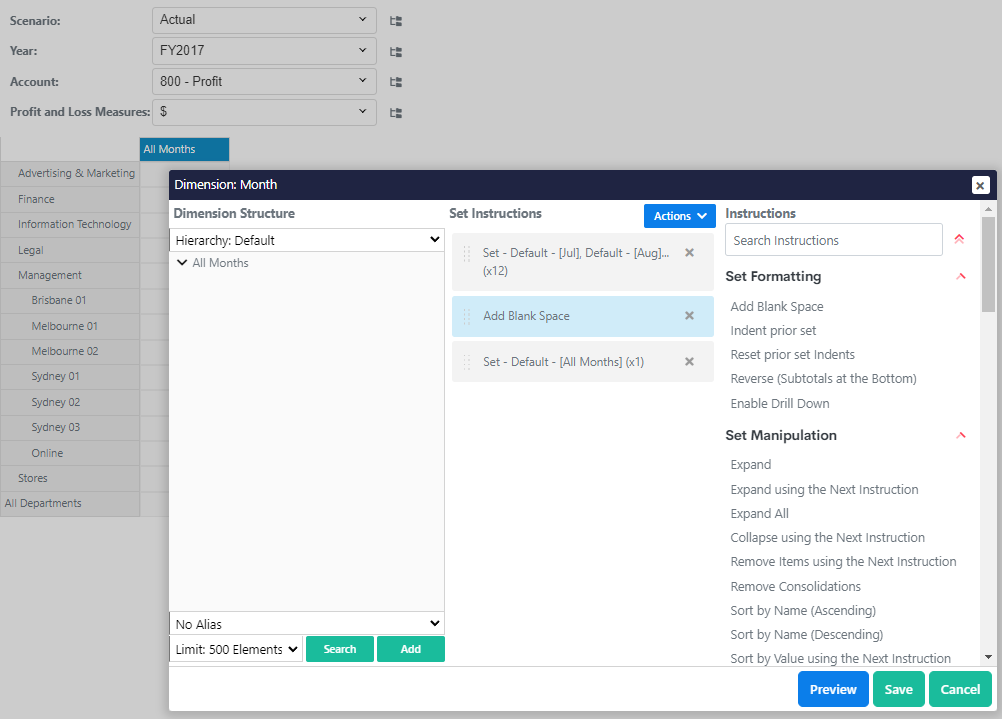
For Month we will go into the set editor and add the 12 months, followed by a blank space and the full year total.
To add all 12 months, we will expand All Months on the left panel in the dialog and highlight all 12 months and hit Add to Selection Instructions
We will use the instructions to add a blank space and rearrange it as shown in the screenshot.
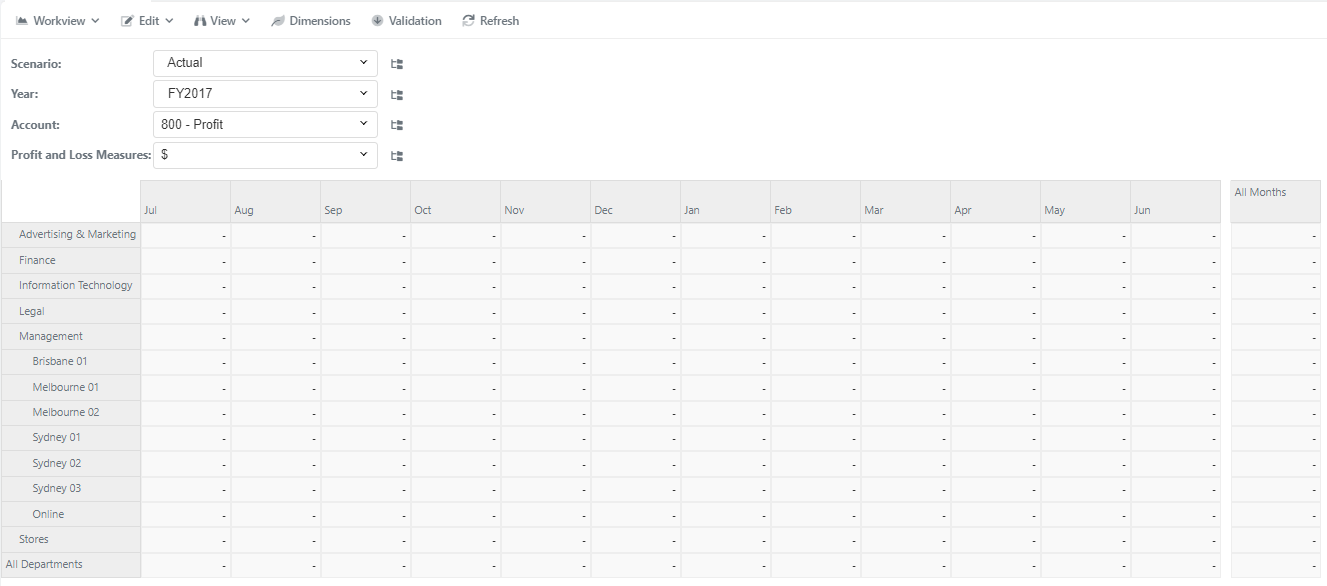
With those instructions added your workview should now look like the below image. You will also notice that The selectables at the top the the workview can now be used to switch between accounts , years and scenarios.
