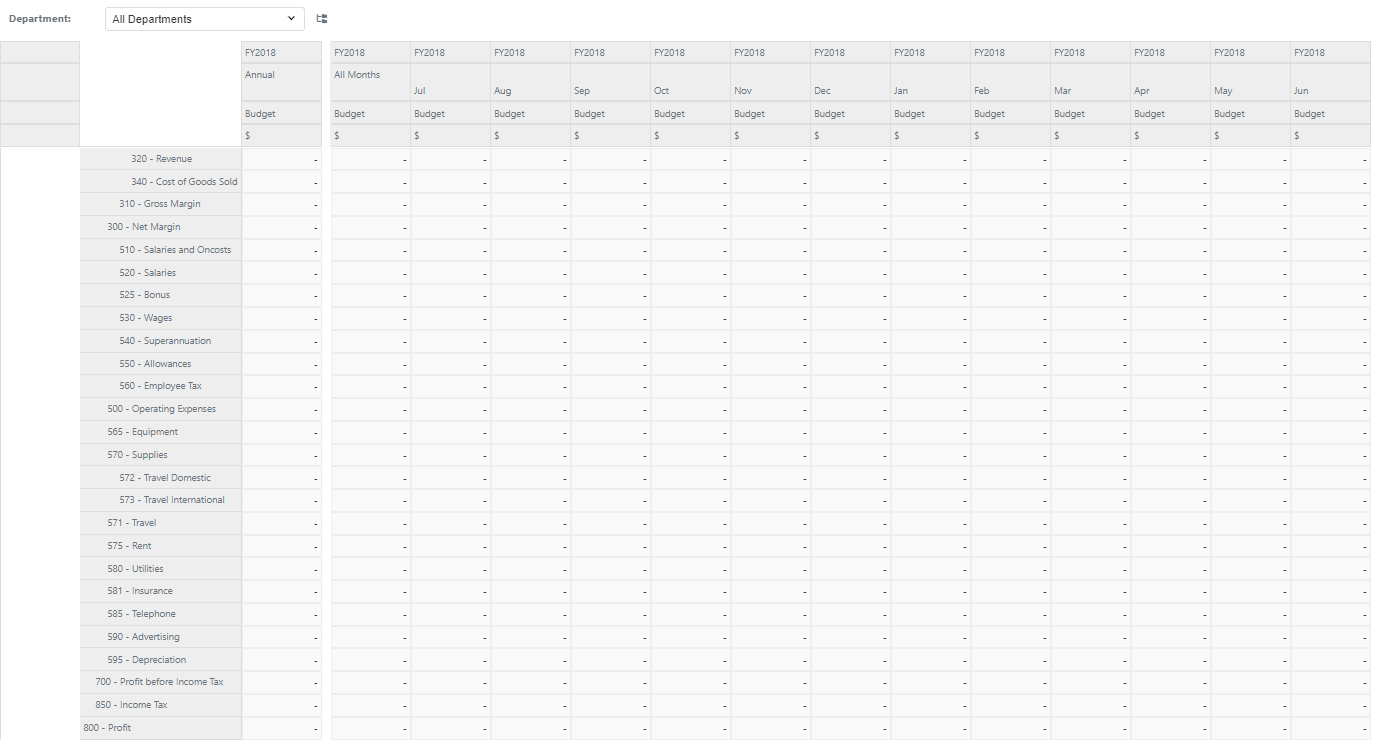
Sets
We didn't cover the concepts of Sets earlier. We will add a set to the left of the rows header and then two to the right. Each set is independent of the other sets and can have its own instructions.
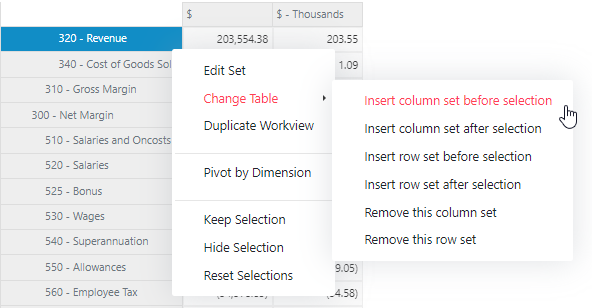
We will begin by adding by inserting columns. Right click on the highlighted cell in the screenshot and select Insert column before selection under Change Table.
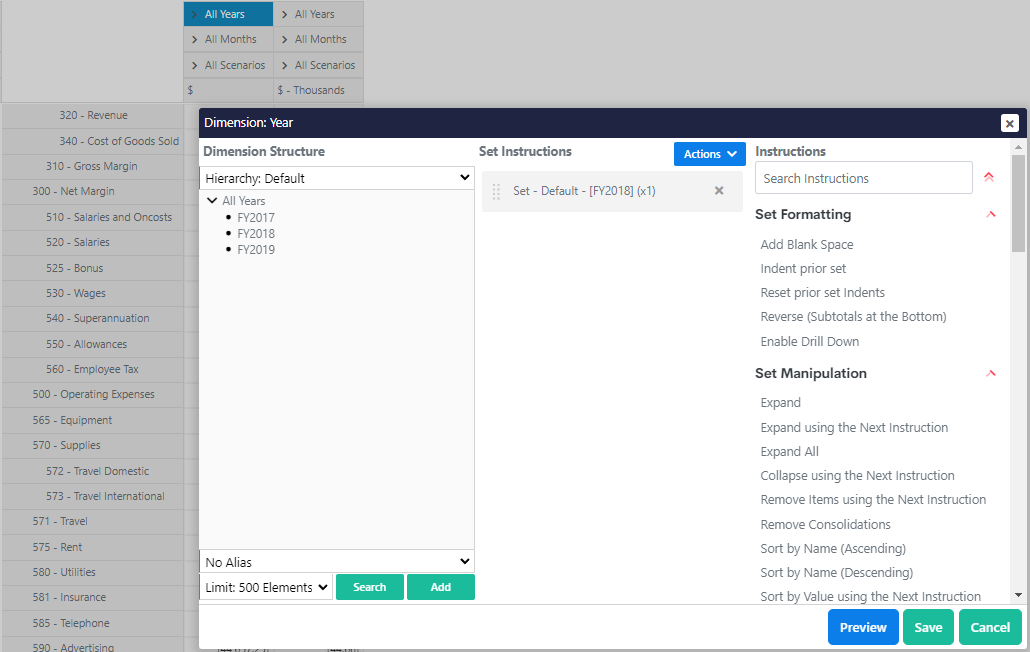
Double click on a Year cell to open the Set Instruction dialog. Remove what's in there and add just FY 2018. Hit Save.
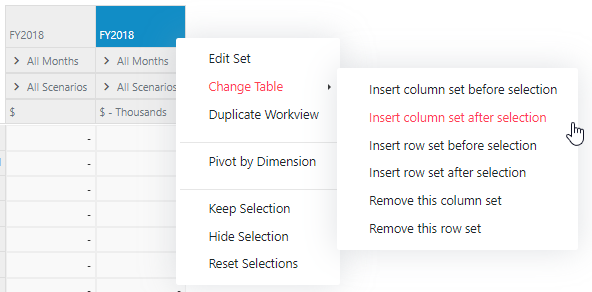
Then right click on the last column on the right side, and click Insert column after selection add a column.
Double click on the cell in the top-right corner and add Add Blank Space and FY2018 and hit Save.
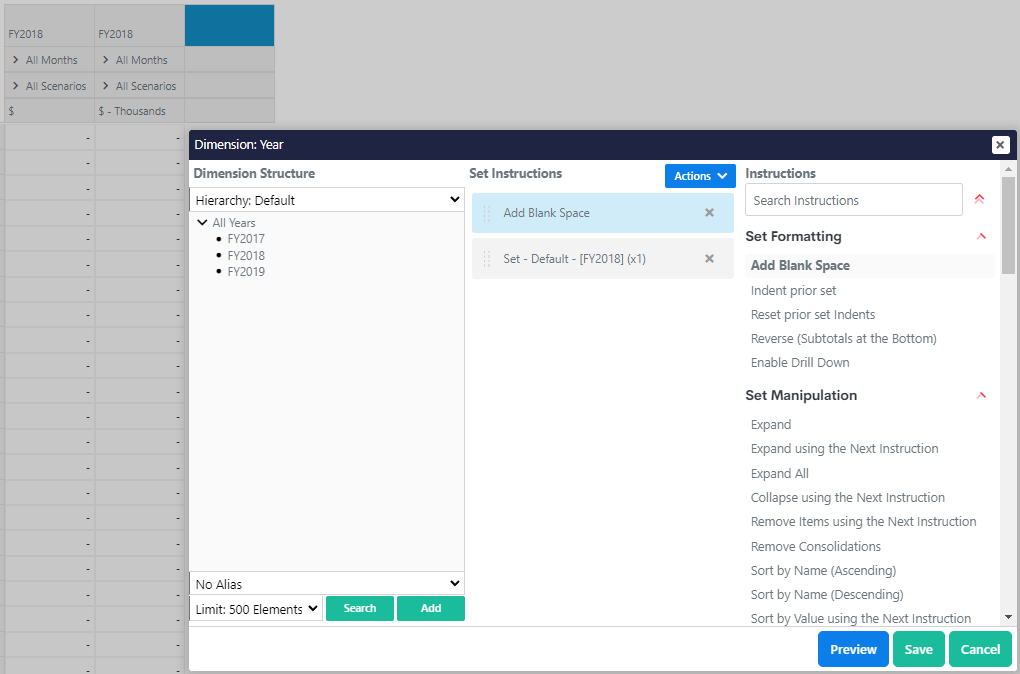
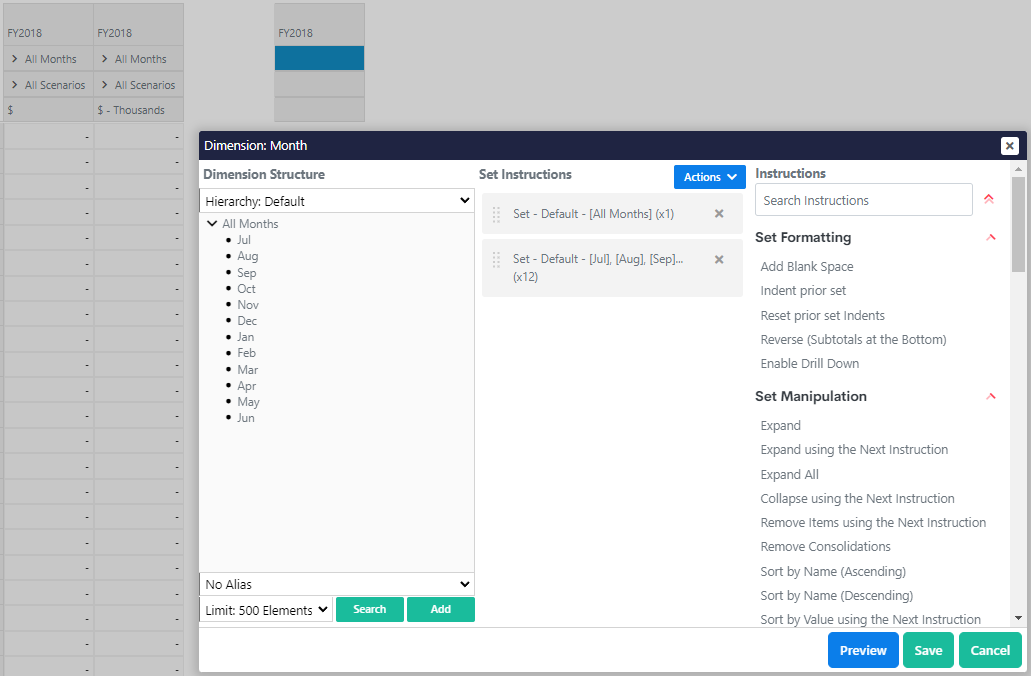
Then, double click on the cell underneath it along the All Months row, select all elements under All Months. See the following screenshot for reference.
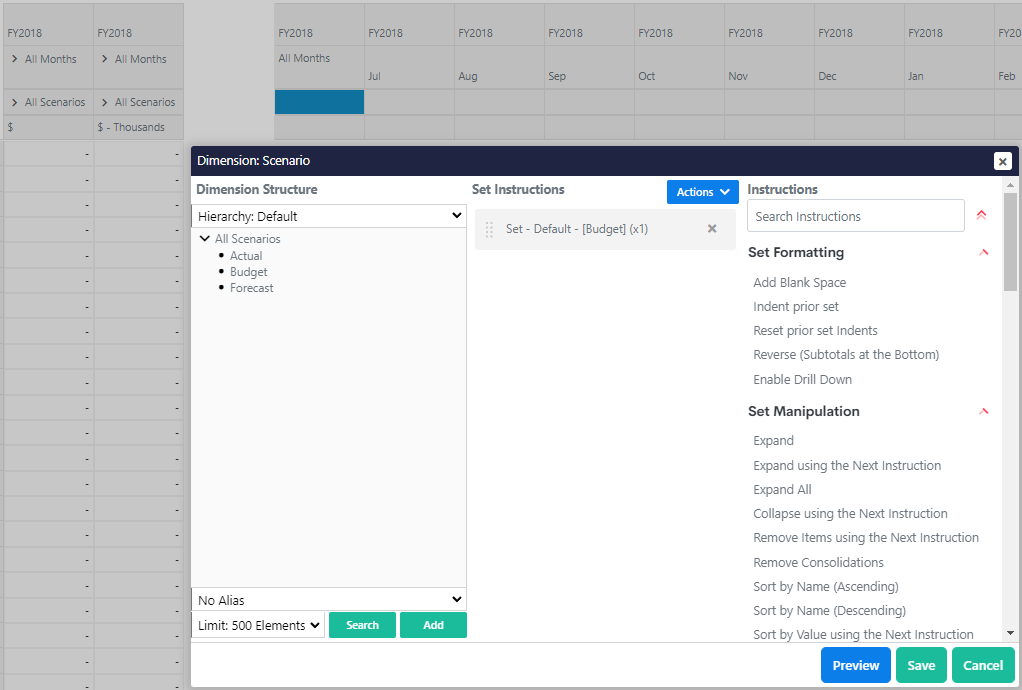
Double click on the highlighted cell and select Budget under Default and hit Save.
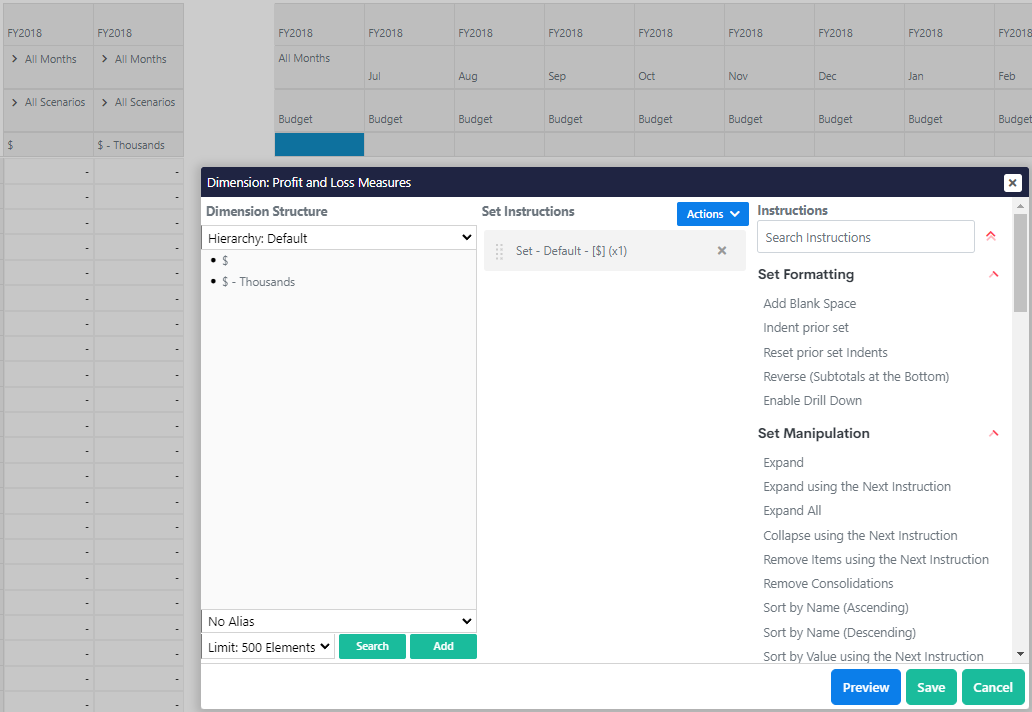
Double click on the highlighted cell and remove existing instructions. Then select $ under Default and hit Save.
Let's repeat that on the section on the right-hand side. Double click on the highlighted cell and remove existing instructions. Then select $ under Default and hit Save.
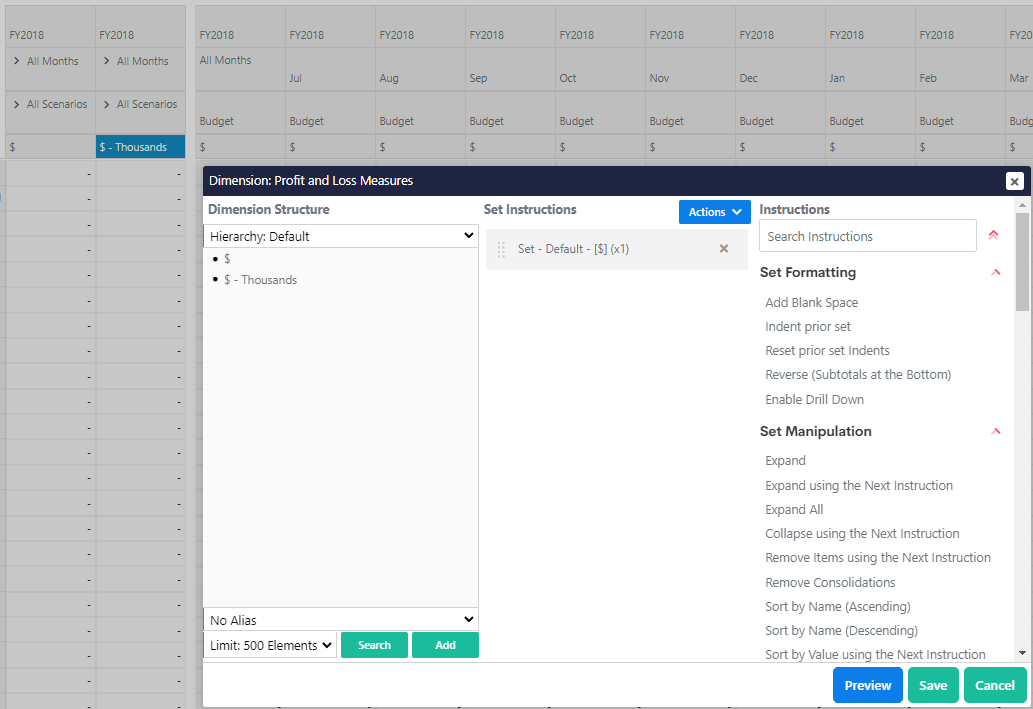
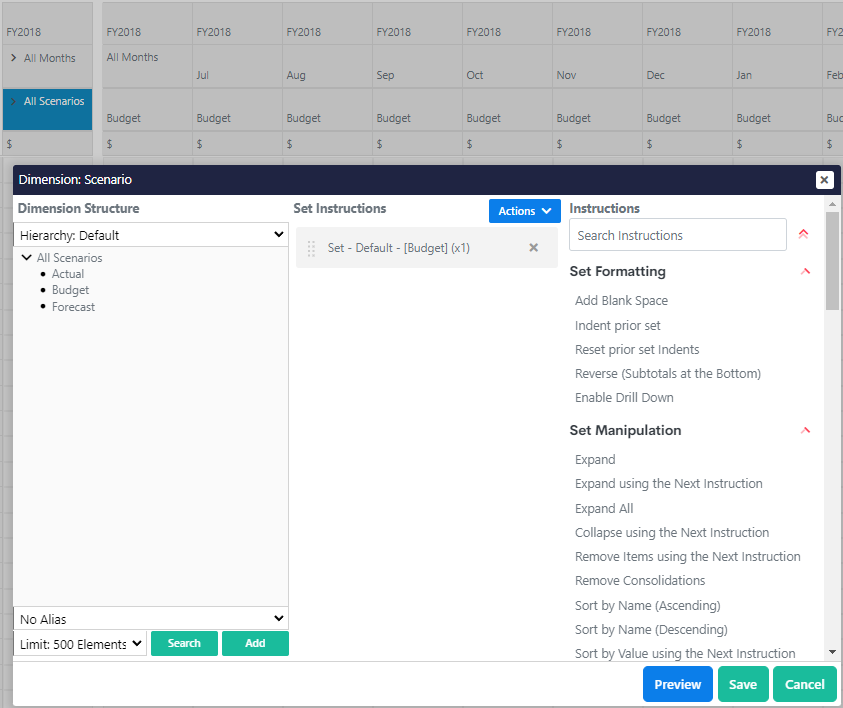
Double click on the highlighted cell and remove existing instructions. Then select Budget under Default and hit Save.
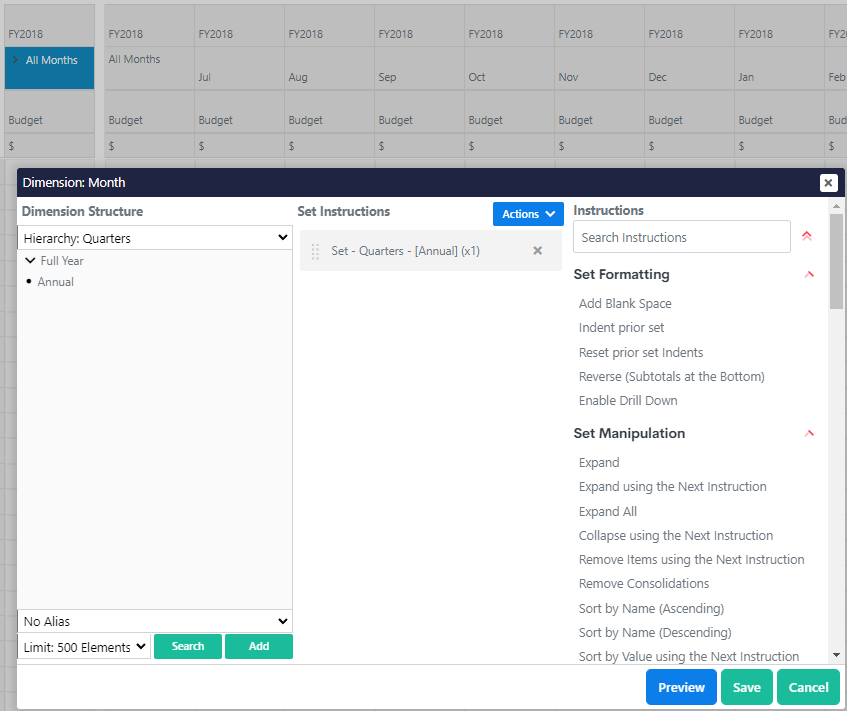
Double click on the highlighted cell and remove existing instructions. Then select Annual under the Quarters hierarchy and hit Save.
The workview should now look like the following:
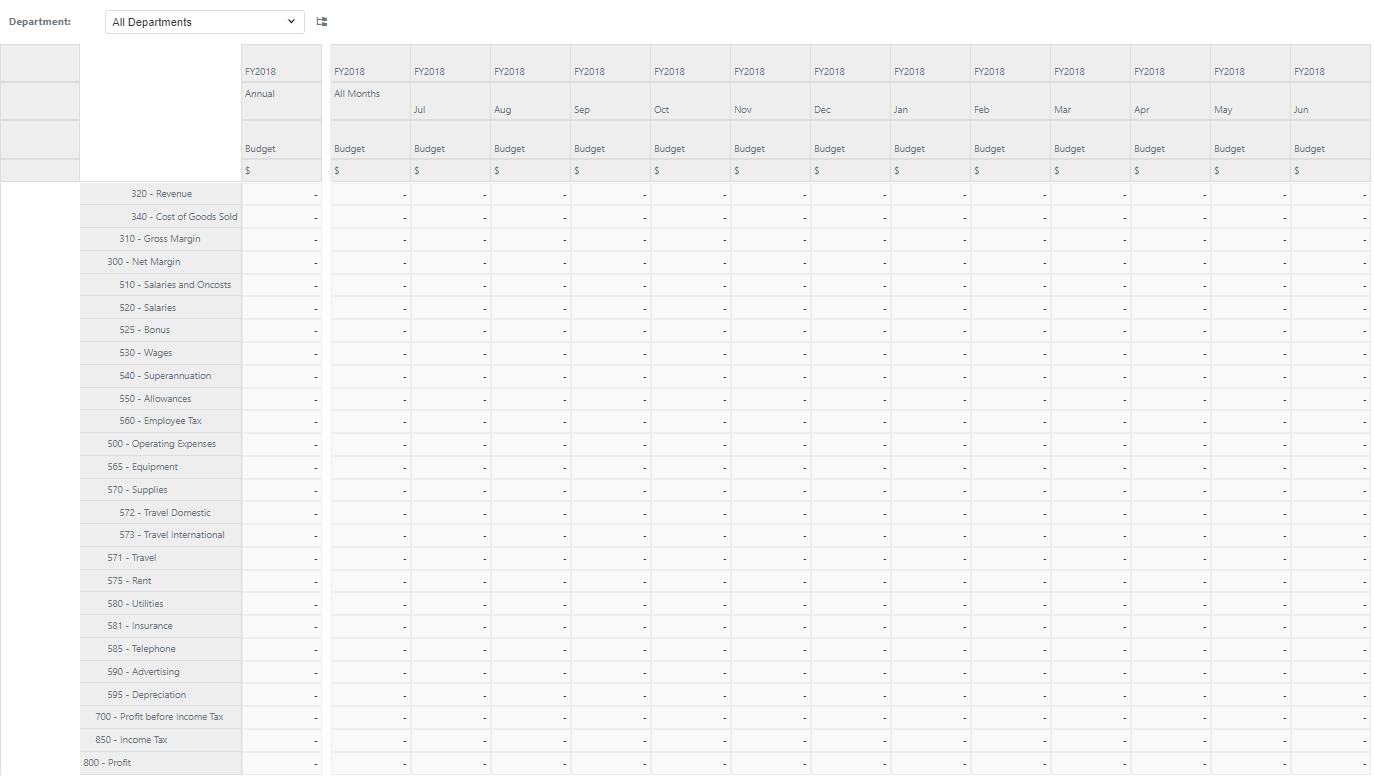
We can now add some formatting to remove some of the unnecessary spaces and gaps. For each of the cells shown below, double click on the cell to enter the set editor and add the set instruction Reset prior set Indents
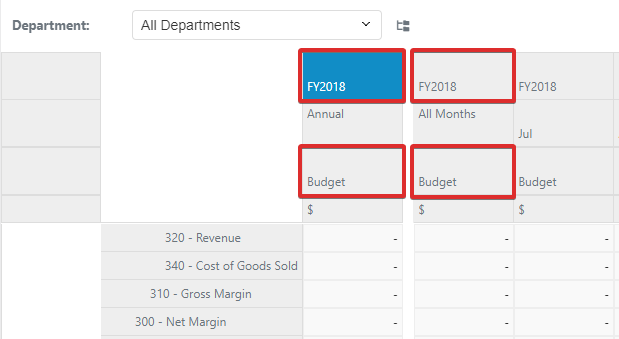
The column headers should not have any spaces in the Year and Scenario sections. The workview should now look like the following:
