
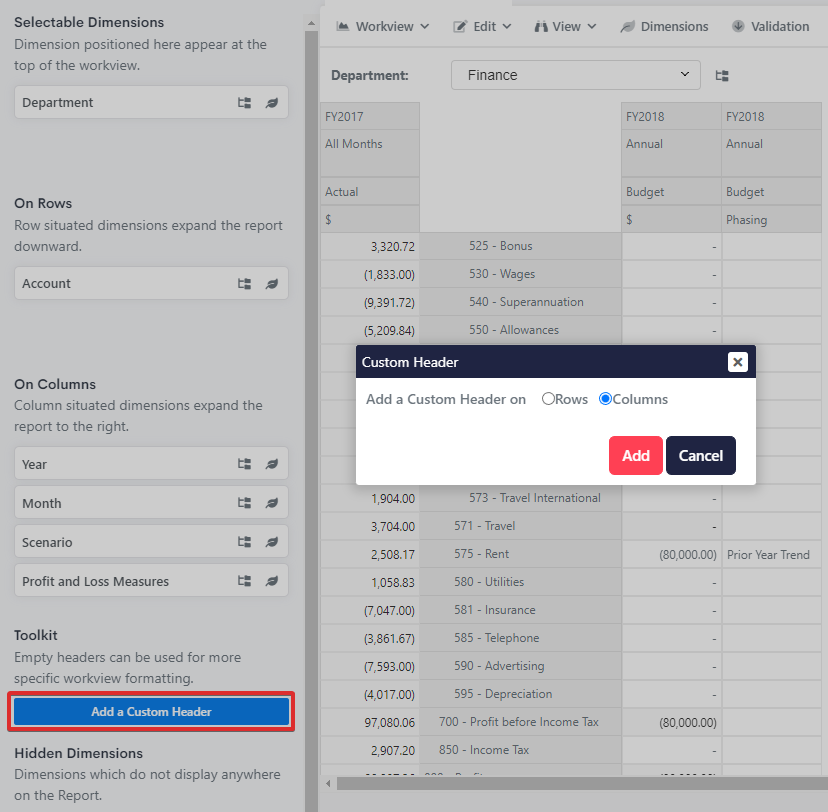
Custom Header
We can add a new custom header to the report on columns from the panel on the left side.
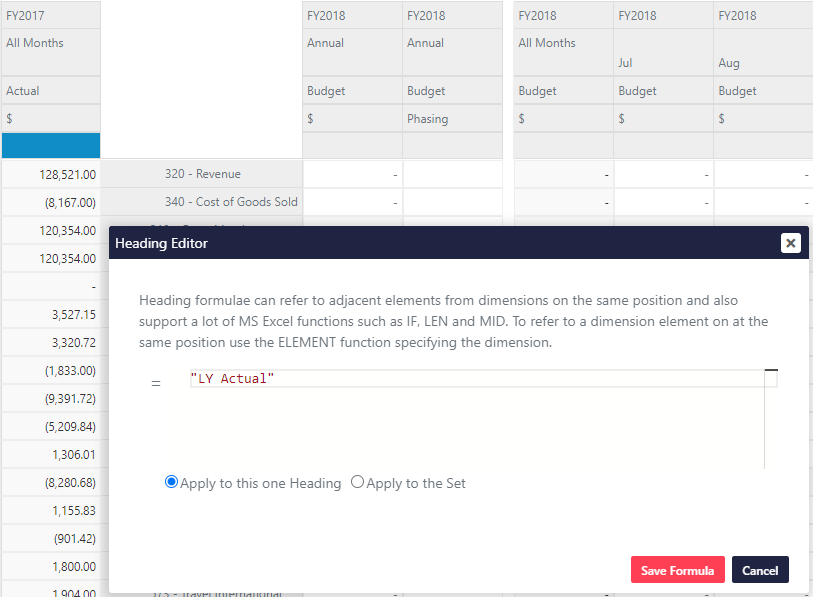
By double-clicking on the custom heading we can type in a new value to display for each column. Make sure to add double quotes around the text. We will name the first column LY Actual.
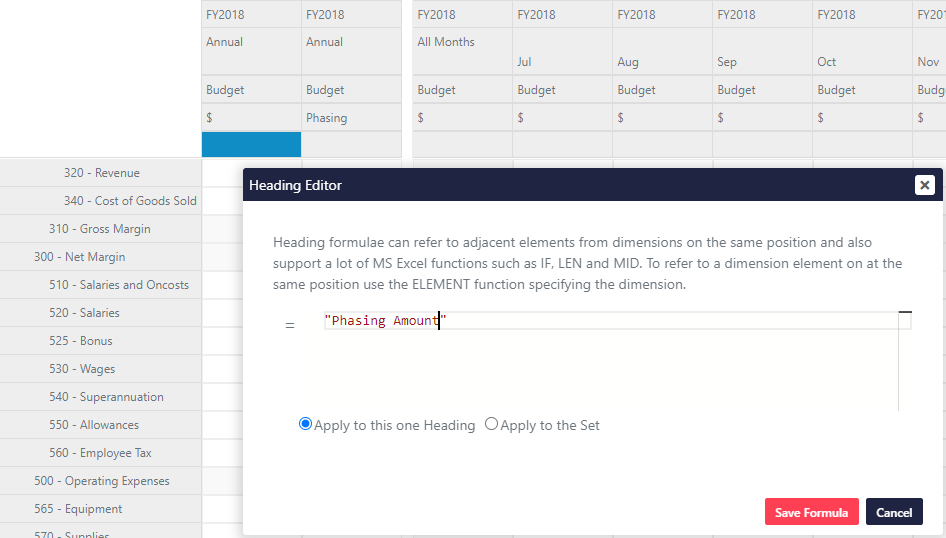
Second column will be named Phasing Amount.
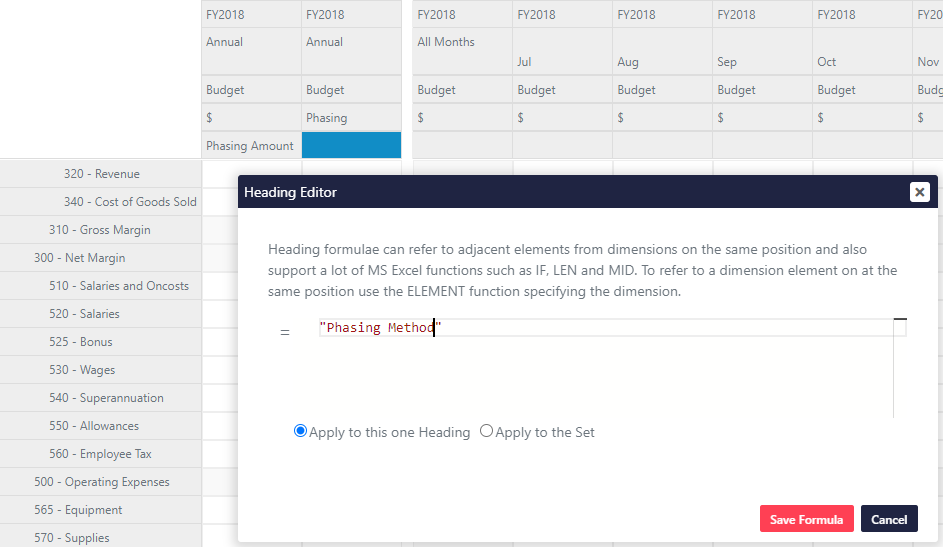
Third column will be named Phasing Method.
For our second set we can go through each column and name them. However, naming each individual column for the entire set is inefficient; instead, we could implement a formula that applies to the entire set.
Add the following formula to the header editor and click the Apply to the Set and save formula.
js
IF( ELEMENT("Month")="All Months",
    ELEMENT("Year") & " - " & ELEMENT("Scenario"),
    ELEMENT("Month") & " - " & LEFT(ELEMENT("Scenario"), 3)
)
The workview header should now look like the following. In the next section we will hide the uncessary headers.
