Cards to PDF
Cards are able to be viewed and downloaded as PDF files.
View card as PDF in Editor
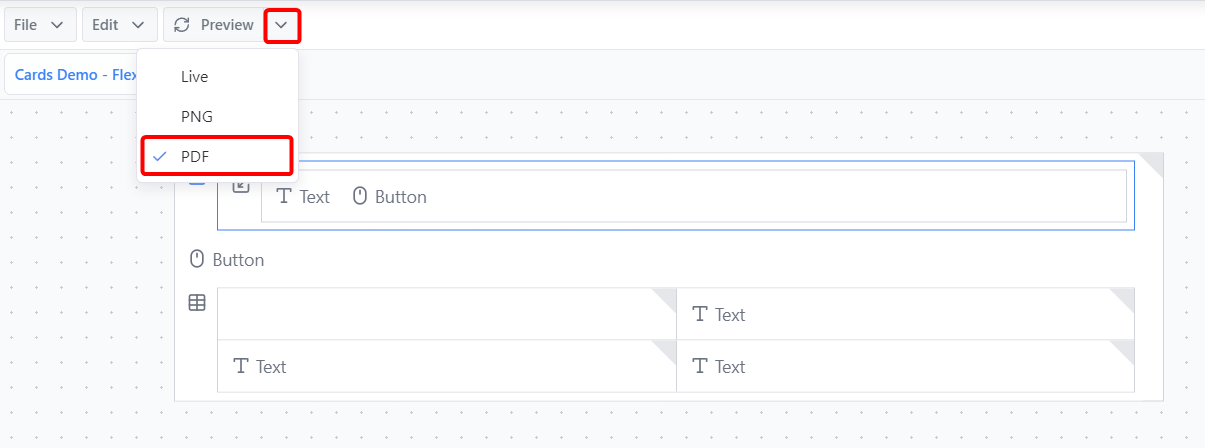
To view a card in PDF format while working in the card editor, click on the dropdown arrow next to "Preview" and select "PDF". 
Click "Preview" and the PDF version of the card will appear in the card preview panel.
INFO
Right clicking on the card preview panel and clicking "Save as..." allows you to save the PDF directly from the backend.
Create a card download as PDF button
Using Button components, cards can be downloaded as PDFs from the frontend.
Drag a Button component into the desired card. This button will be the button clicked to initiate the PDF download.
Select the button icon in the card editor panel to open the button properties. Under the Styling section, write
Download PDFinto the Text property.Under the Export section, there are two essential properties for creating a PDF download button:
- Card Export - Set this to the Name of the card that should be downloaded on click.
- Card Export Format - For a PDF, this should be set to
PDF
Once these two properties are set, save the card. The download button will now work on the frontend.
Other Useful Properties
There are other properties under the Export section that enable further customisation of the output PDF.
Card Export Width and Height These numerical values determine the width and height of the PDF and allows for manual adjustments.
Use Dashboard Context This determines if the PDF card should use the context of the current dashboard to determine what is shown on the PDF or not. By default it is set to Yes. If set to No, then by default the PDF will use the context that the PDF card has in the card editor. This only changes if Additonal Context is adjusted.
Additional Context This property enables dimension values to be manually overridden. See below methods for setting dimension values using this property:
Dimension Setting - Basic The method for setting a dimension within this property simply follows the below formula:
[Dimension Name]=[value]A working example would be as follows:
Time=2025Dimension Setting - Multiple Dimensions To set multiple dimensions in the property, follow the Basic formula and concatenate with "&". The formula would be as below, and as many variables as desired can be concatenated in this way:
[Dimension Name]=[value]&[Dimension Name 2]=[value 2]A working example would be as follows:
Time=2025&Scenario=BudgetDimension Setting - Dynamic The dimension can also be set dynamically rather than strictly through static values. By clicking the pi icon on the property, the property editor opens. ELEMENT() values, VARIABLE() values and more are able to be parsed in through this editor.
The formula changes a bit in the regard that sections must be surrounded by double quotes and concatenated with the & symbol when joining on aforementioned dynamic portions (such as ELEMENT() and VARIABLE()). Setting the context of a single dimension would follow the below structure (using VARIABLE() as an example):
"[Dimension Name]="&VARIABLE("var-name")A working example would be as follows:
"Time="&VARIABLE("selected-time")Variable Setting - Dynamic Multiple Variables Multiple dimensions can be set dynamically using a similar concatenation structure shown in the "Multiple Dimensions" section, adjusted slightly to fit the formatting required in the property editor shown in the "Dynamic" section.
The concatenation requires the "&" symbol, however this needs to be wrapped in double quotes alongside the ampersands outside of quotes that concatenate your dynamic values into the formula. As many variables as desired can be concatenated onto the formula following this structure (using VARIABLE() as an example):
vb"[Dimension Name]=" & VARIABLE("var-name") & "&[Dimension Name 2]=" & VARIABLE("var-name-2")A working example would be as follows:
vb"Time=" & VARIABLE("selected-time") & "&Scenario=" & VARIABLE("budget-scen")