
Cards in Dashboards
In an Application, a card is able to be added to a screen through a dashboard. Dashboards enable the setup of multiple widgets (which can be rearranged as desired) and enables further screen customisation.
Follow the below steps to add a card to a dashboard (and screen).
Navigate to the desired application in the backend.
In the "Dashboards" tab, click "New Dashboard" on the top right. Enter a name (this can be changed later) and click "Okay".
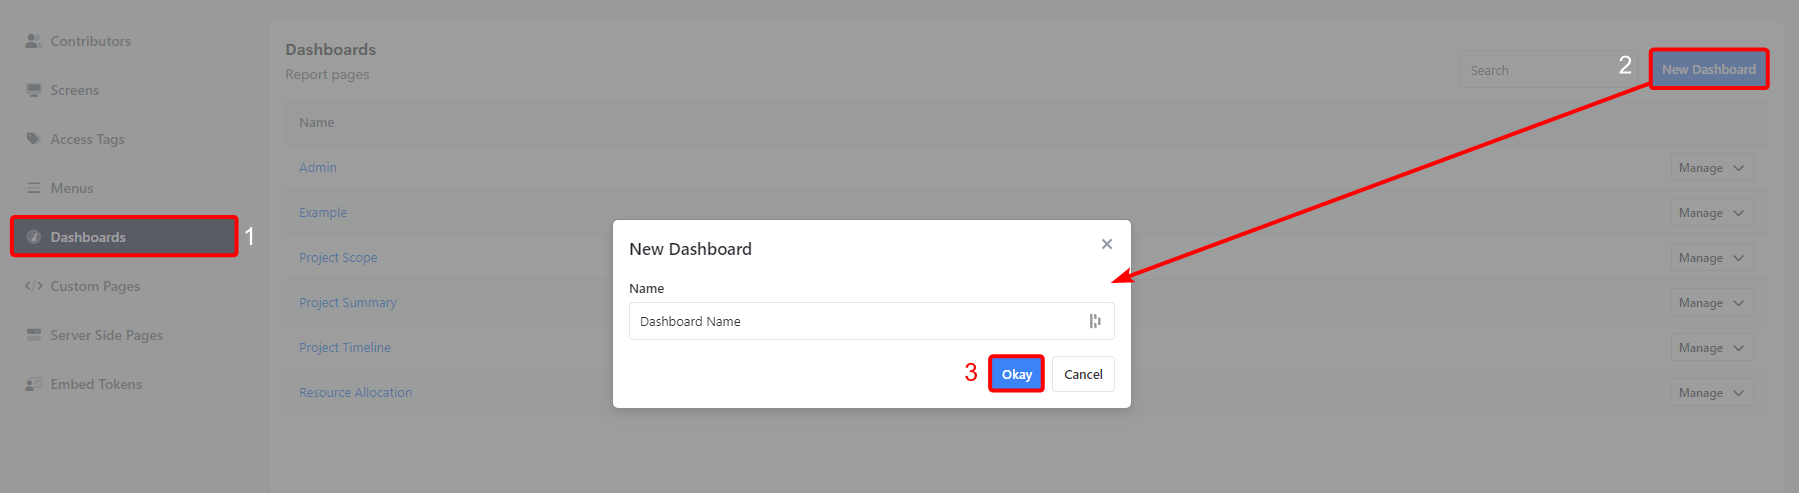
The new dashboard will appear in the list. Click on the dashboard's name to open it.
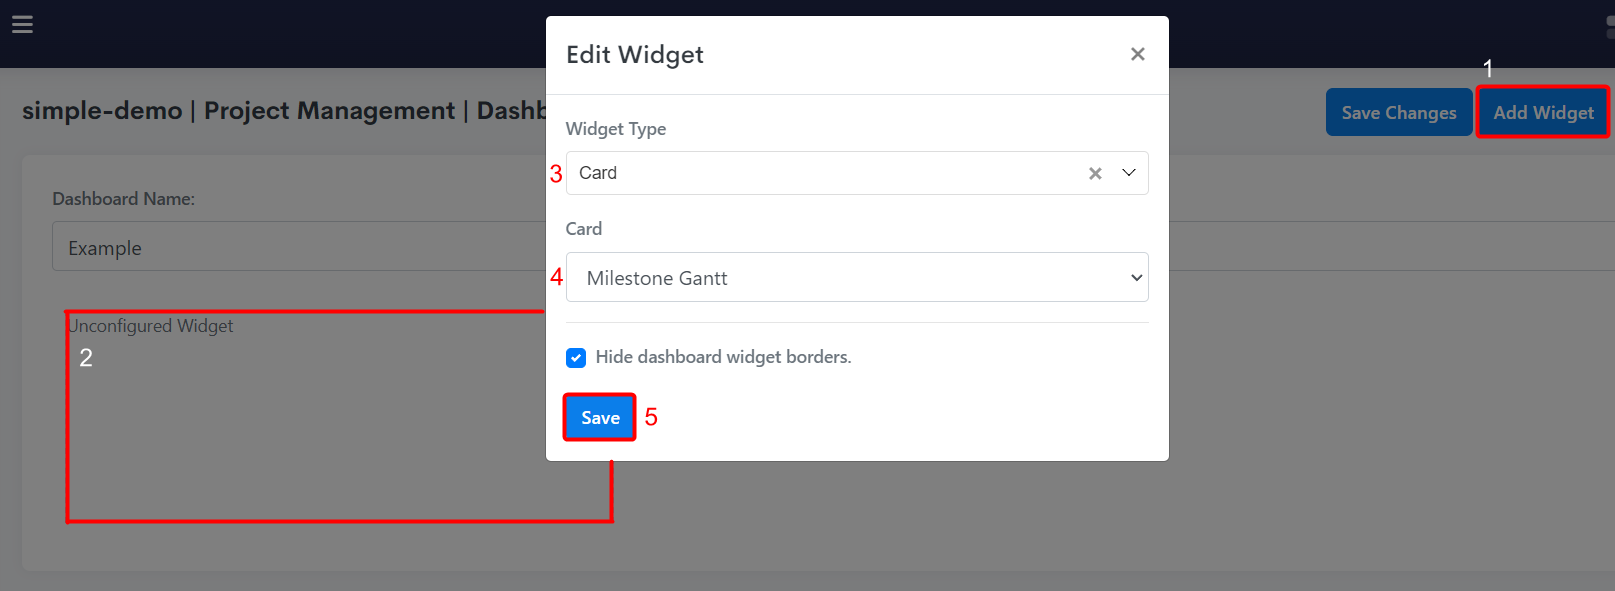
The dashboard will initially appear as a blank screen with the Dashboard Name title field and some control buttons to the top right. Click on the "Add Widget" button to add a widget to the dashboard.
The new widget will appear as a box with a dashed border, encasing the words "Unconfigured Widget". To configure the widget, hover over the widget box and click on the Pencil icon.
In the popup that appears, select "Card" from the "Widget Type" dropdown. This will cause another dropdown to appear below.
In the second dropdown select the name of the card desired to be put on the dashboard.
INFO
The "Hide dashboard widget borders" checkbox, when checked, will hide the border of the widget box from the frontend.
The selected card will now appear within the widget container. The container can be expanded or shrunk by hovering over it and dragging the edges of the container.
INFO
As many widgets as desired can be added to the dashboard, and all widgets can be clicked and dragged around to relocate positions. Other widgets can be used to work with cards in dashboards. For example, the selectable widget can be used to alter the context of the card.
To save the dashboard click "Save Changes" in the top right corner.
Navigate back by clicking "Back" in the top right corner.
In the "Screens" tab, click "New Screen" on the top right.
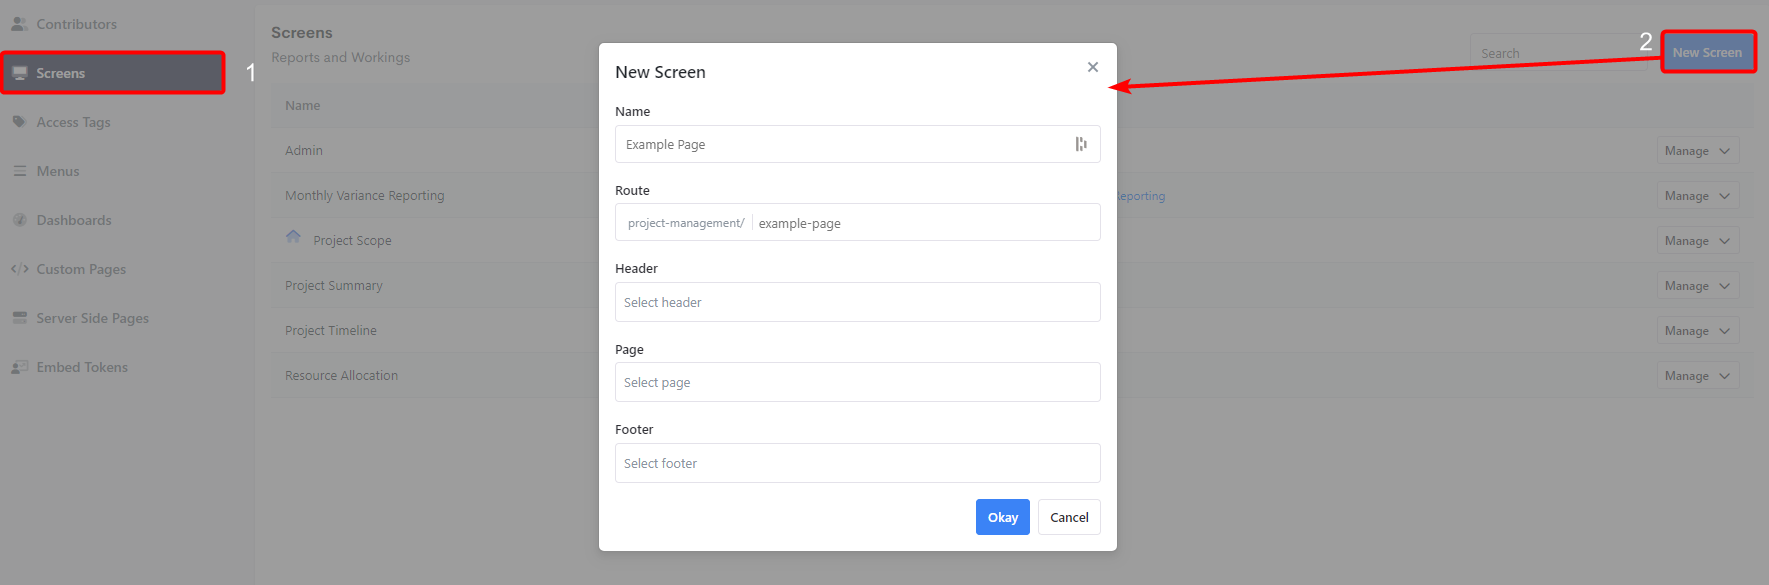
Name the screen accordingly. This name automatically fills out the route, but the route can be edited separately after.
In the "Page" section, select the desired dashboard from the dropdown. This dashboard will make up the content (body) of the page.
INFO
Dashboards in this dropdown will be prefixed with
Dashboard -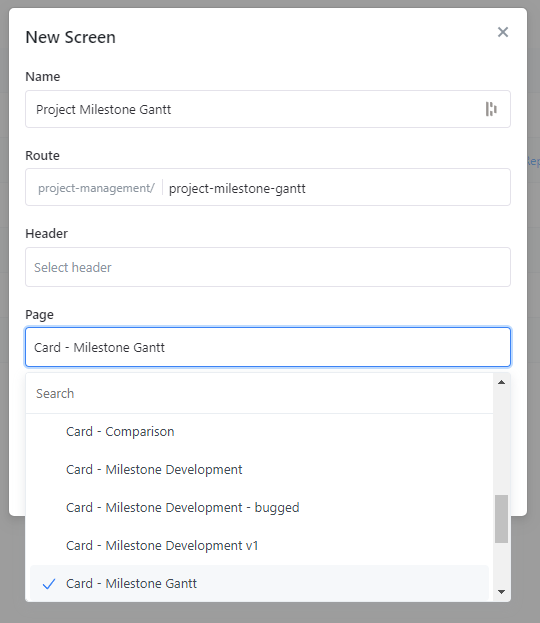
Headers and footers can be added as desired.
Click the blue "Okay" to publish the new screen.
Ensure you add the new screen to the application's menu if needed.
INFO
If the application has screen security, the screen will not be visible on the frontend unless you add the screen to an access tag. Ensure you have this access tag if you wish the view the new card screen.*