Cards
The Cards group in the MODLR PowerPoint Add-In is used to insert MODLR cards in your presentation slides as images.
The group is also used to update an existing card on your slide, refresh slides, or to provide a global level context for your cards.

Insert Card
Use Insert Card to select a predefined card from your MODLR model and embed it into your slide.
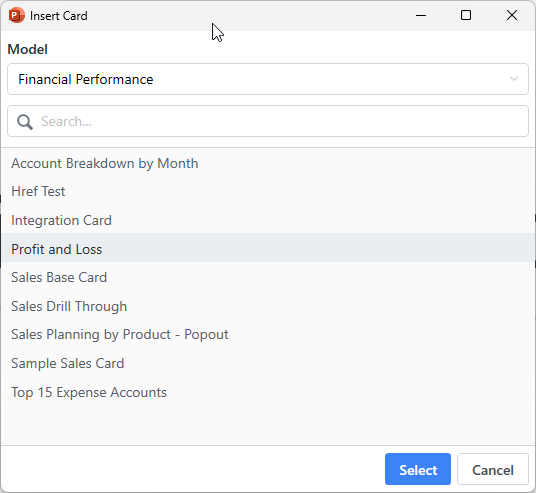
Clicking Insert Card opens the card selection window:

- Model: Choose a model to browse available cards inside that model.
- Search: Quickly find a specific card by name.
- Card List: Displays available cards.
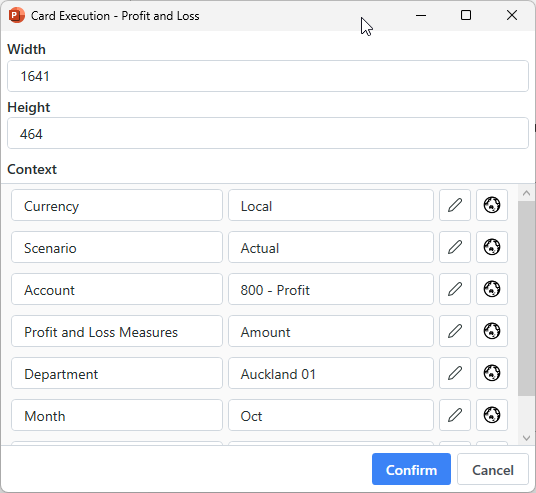
After selecting a card and clicking Select, you'll be prompted to define the card’s size and data context:

- Width / Height: Defines the size of the card in pixels on the slide.
- Context: Configure dimensions that your card uses, like Currency, Scenario, Account, Department, Month, etc for example.
Each context field allows:
- Pick Element (pencil icon) to be prompted with a list of elements to choose from for that dimension.
- Linking to Global Elements (globe icon) to choose to have this dimension for you card use a presentations global value for that dimension.
Once confirmed, the card is rendered on your slide.
Refresh Slide
The Refresh Slide and Refresh All Slides buttons update the cards on the current slide or throughout the entire presentation to reflect any changes in the global context or source data. This is especially useful when updating the reporting period (e.g., changing from March to April), ensuring all cards display the latest figures accordingly.
Update Card Image
Selecting an existing card image on your PowerPoint slide and clicking Update Card Image will reopen the Card Execution window (the same one shown when inserting a card). This allows you to modify the card’s context, dimensions (width and height), or other settings without needing to reinsert the card.
Global Elements
Global Elements allow you to define presentation-level values for specific dimensions, which can be used across multiple cards. When a card is configured to use a "Global" value for a dimension (e.g., Month, Scenario, Department), it will pull the value from the corresponding Global Element—ensuring consistency and simplifying updates.
This is especially useful for setting a common reporting context such as:
- Time period (e.g., “March 2022”)
- Scenario (e.g., “Actual”)
- Region or Department
When you refresh cards, any dimension set to "Global" will be overridden by the corresponding Global Element.
Managing Global Elements
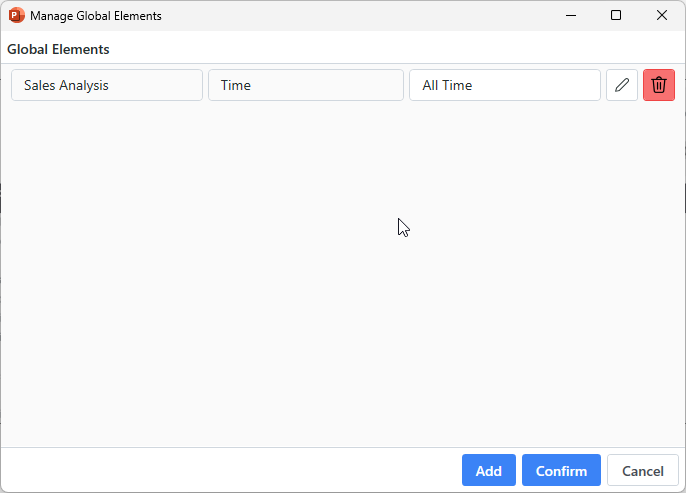
Clicking on Global Elements opens the management window:

Each Global Element entry defines:
- The Model
- The Dimension (e.g., Time, Department, Currency)
- The Value to apply globally (e.g., “All Time”)
You can:
- Pick Element (pencil icon) to be prompted with a list of elements to choose from for that dimension.
- Delete Element (trash icon) Remove an entry
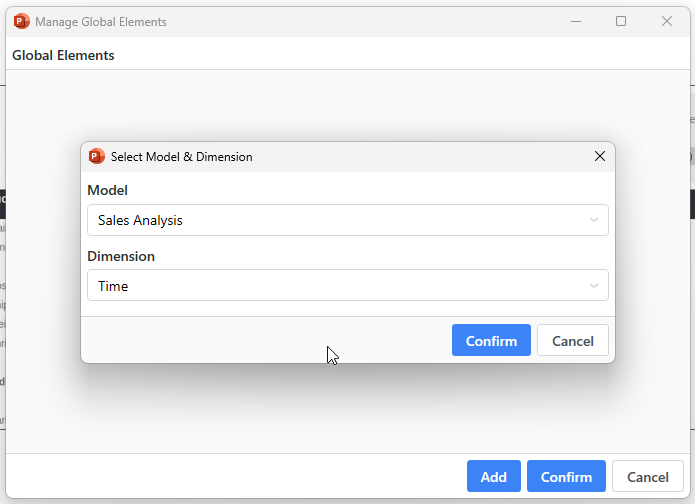
To add a new Global Element, click Add, which opens the selection dialog:

Choose the appropriate model and dimension, then click Confirm to proceed.
Once confirmed, this Global Element will be available to any card that references the same model and has that dimension set to “Global.”